As the title suggests, the purpose of this article is to share the technologies and solutions used in the process of creating and deploying this website, providing a straightforward guide for anyone looking to replicate it. At the same time, this article serves as a personal retrospective on some technologies I’ve learned but haven’t fully grasped, helping me optimize my own workflow. I am not a computer science major, but I did pick up some programming basics during high school and college. So, if I can do it, anyone should be able to.
The technical difficulty of building a personal website is not actually that high. If your sole goal is a successful deployment, you don’t even need to fully understand the underlying principles of every step. However, when you encounter errors along the way, you will need a basic understanding of what the code is doing in order to troubleshoot and find the root cause.
When you run into difficulties, I highly recommend leveraging language models for real-time assistance; their knowledge base can help solve many kinds of problems. Of course, knowing how to ask the right questions and having the ability to judge whether answers are reliable are equally important skills. We will explore this topic together in a future article.
Development Platforms and Tools
I use VS Code running on macOS for writing code, so all the commands shared here are designed to run in the macOS Terminal. If you are using a different platform (like Windows), you might need to adjust a few commands to match your system’s syntax.
My personal website is essentially pieced together by integrating existing solutions. The core technologies are Hugo and the PaperMod theme, with GitHub and Vercel handling deployment.
During the building process, I used Google’s language model, Gemini 2.5, to help me structure the site. For the technical roadblocks I eventually hit, I used OpenAI’s ChatGPT to help me troubleshoot. Without their assistance, this process would have been significantly harder.
Building the Personal Website
First, configure your GitHub-associated username and email in Terminal. This allows you to push local content to the cloud later.
git config --global user.name "Your Username"
git config --global user.email "your_email@example.com"
```bash

Next, install [Hugo](https://github.com/gohugoio/hugo/releases). You can follow the official installation guide or install through macOS Terminal. I'll use the Terminal route here.

Make sure [Homebrew](https://brew.sh/) is installed, then run:

```bash
brew install hugo
After Hugo is installed, initialize a new website project:
hugo new site my-blog # Hugo creates a folder named "my-blog"
cd my-blog # Enter the folder
```bash

At this point, the folder is created locally. On macOS, the default location is usually under your user directory.

Hugo itself only generates content; theme controls appearance. You can browse themes on [Hugo Themes](https://themes.gohugo.io/). I'll use PaperMod, which this website also uses:

```bash
git init
git submodule add https://github.com/adityatelange/hugo-PaperMod.git themes/PaperMod
git submodule update --init --recursive
Enable the theme in hugo.toml:
baseURL = "https://<Your URL>.io/" # Ignore this for now
languageCode = "zh-cn"
title = "My Blog"
theme = "PaperMod" # Tell Hugo to use this theme
buildFuture = true # Build markdown files with future dates
```bash

Now create your first post:

```bash
hugo new content posts/my-first-post.md
The new file is stored in content/posts. Open it and you will see something like this:
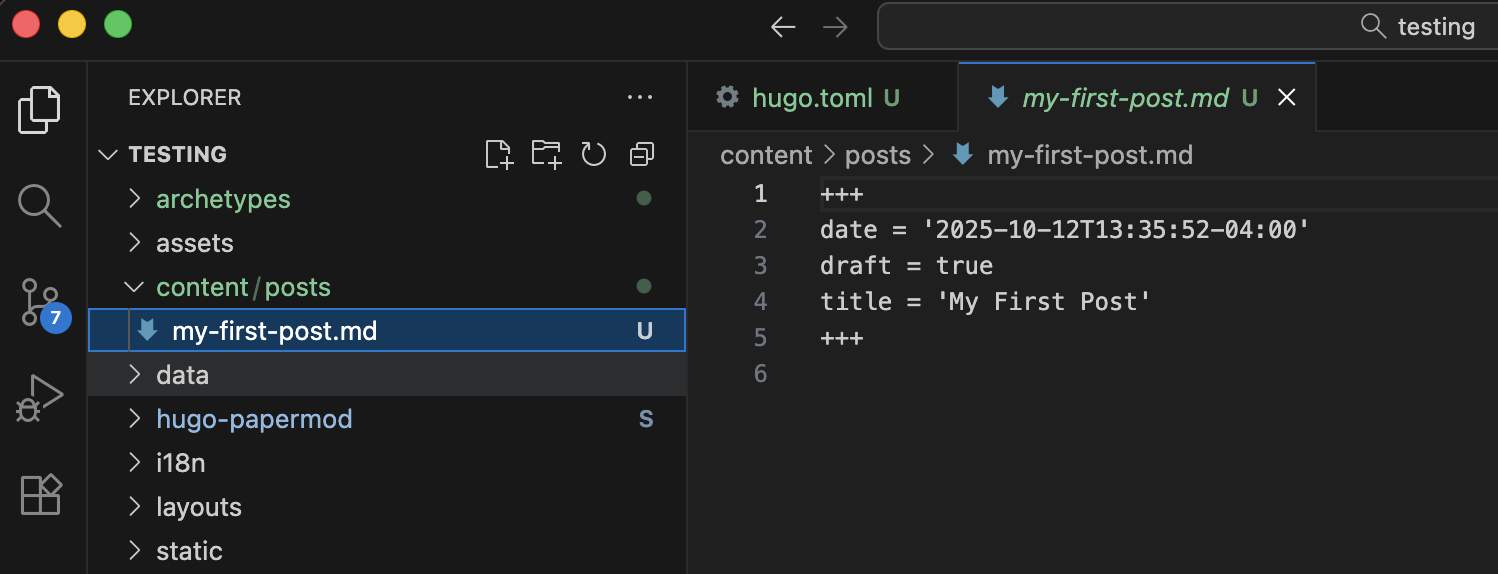
Write your main content below the second +++ block.
+++
date = '2025-10-12T13:35:52-04:00'
draft = true
title = 'My First Post'
+++

First blog post?
```bash

To preview locally, make sure Terminal is in `my-blog`:

```bash
hugo server
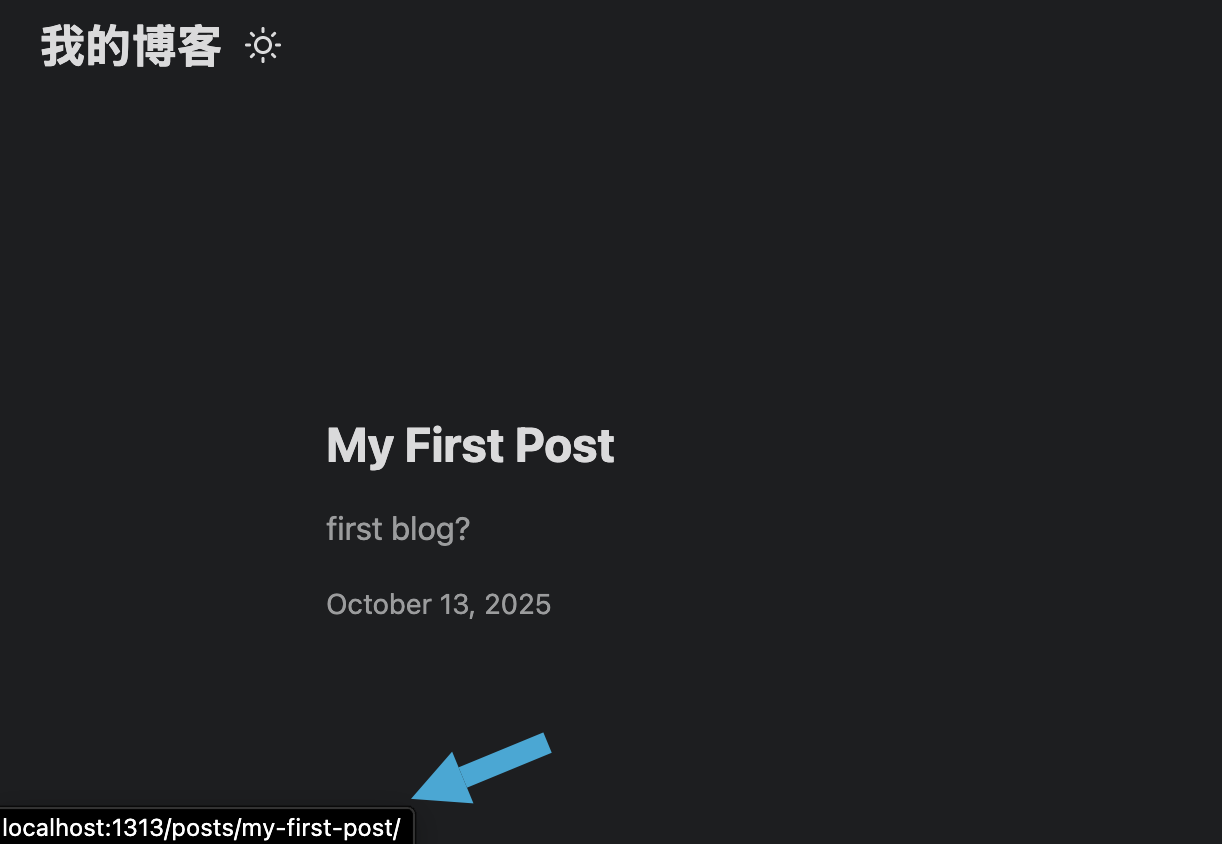
Open http://localhost:1313/ in your browser.
If you see a blank page, it is because draft = true by default. Change it to:
draft = false
```bash
Your post will appear. Any saved changes in the `.md` file will refresh automatically in the browser.
Next, open the folder in VS Code:
```bash
cd ~/my-blog
code .
Create a GitHub repository:
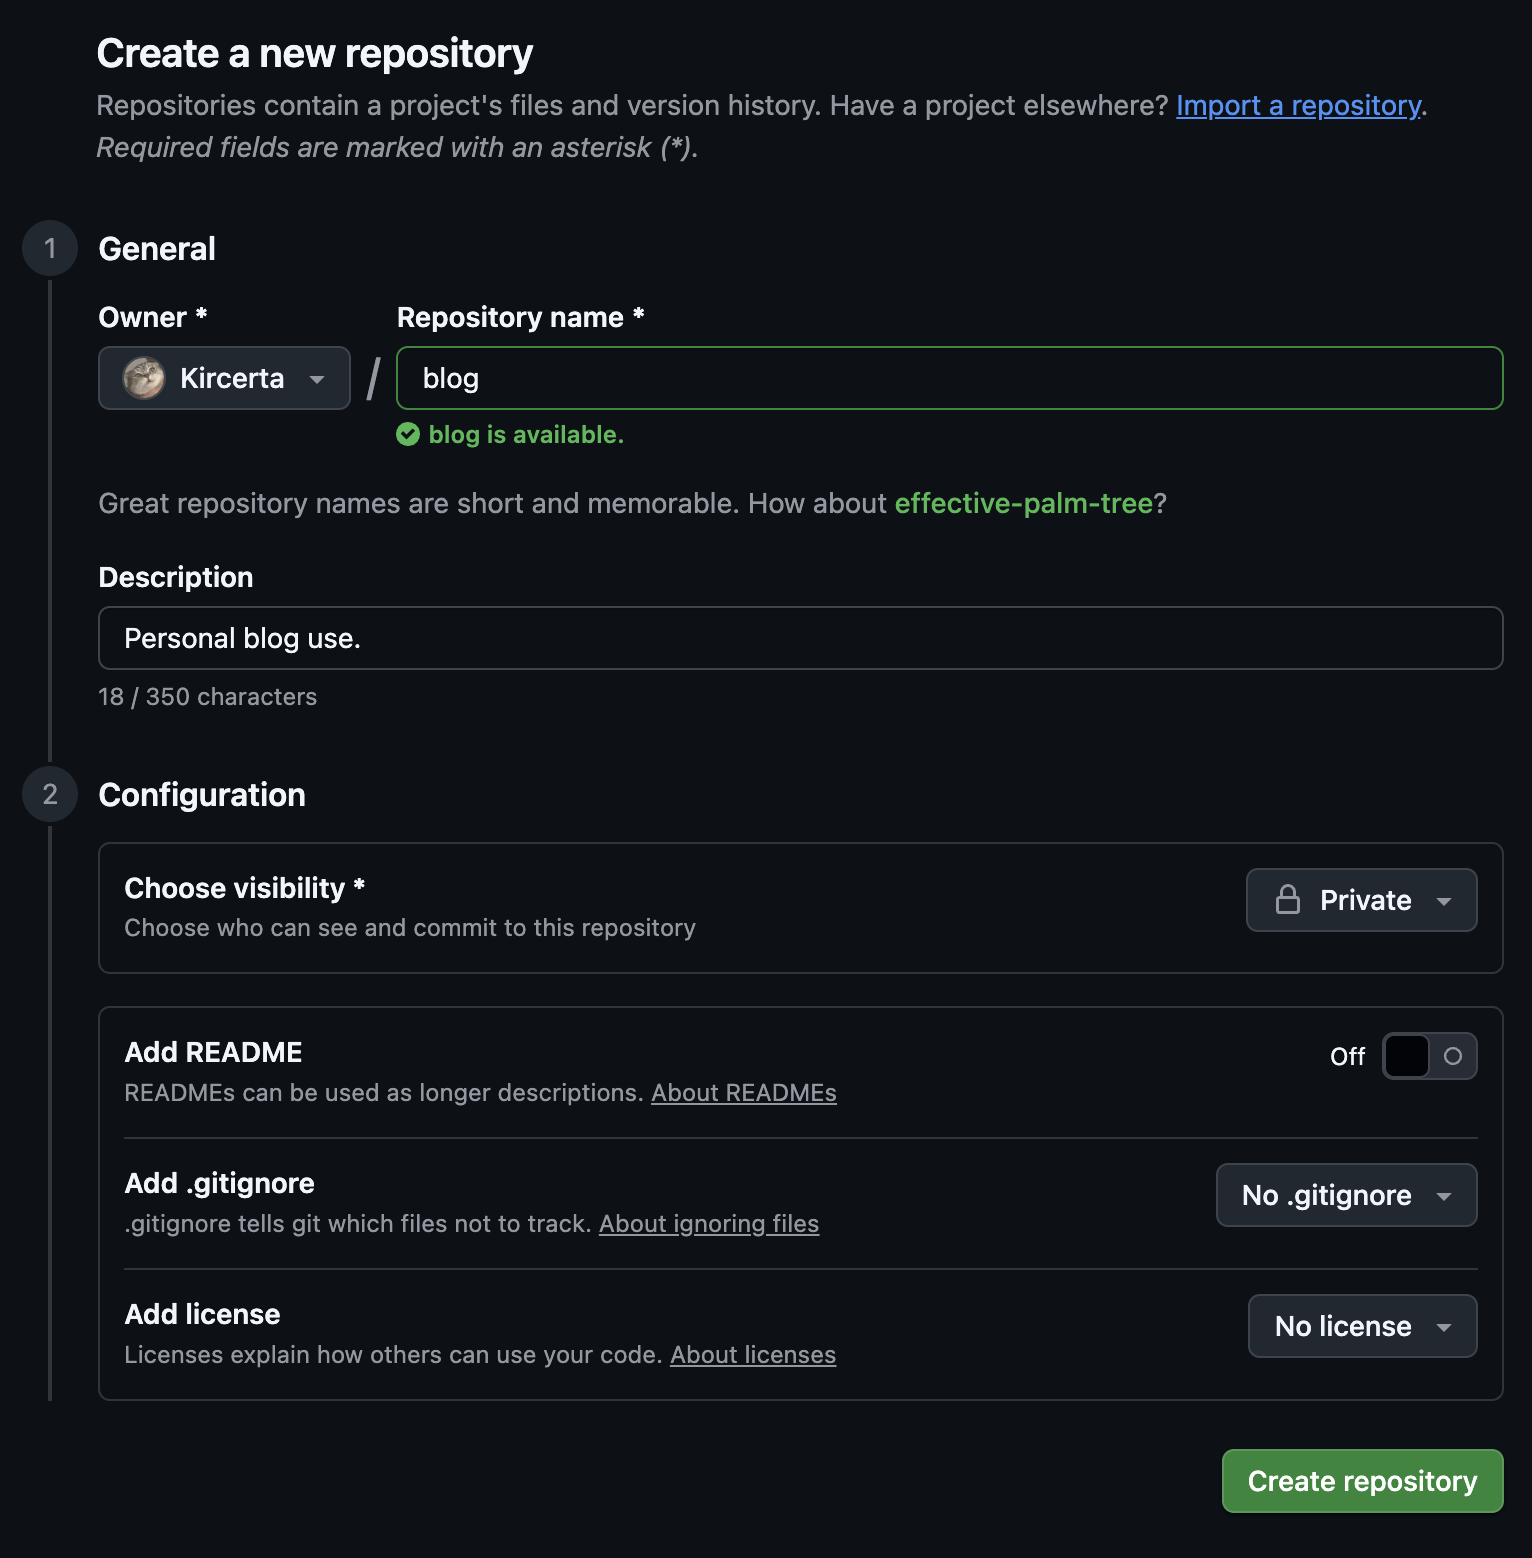
After it is created, you should see something like this:

Back in Terminal, stage and commit:
git add .
git commit -m "saved"
```bash

Then run the commands shown under "...or push an existing repository from the command line":

```bash
git remote add origin https://github.com/yourusername/example.git
git branch -M main
git push -u origin main
# Use the exact commands shown by your own GitHub repository page.
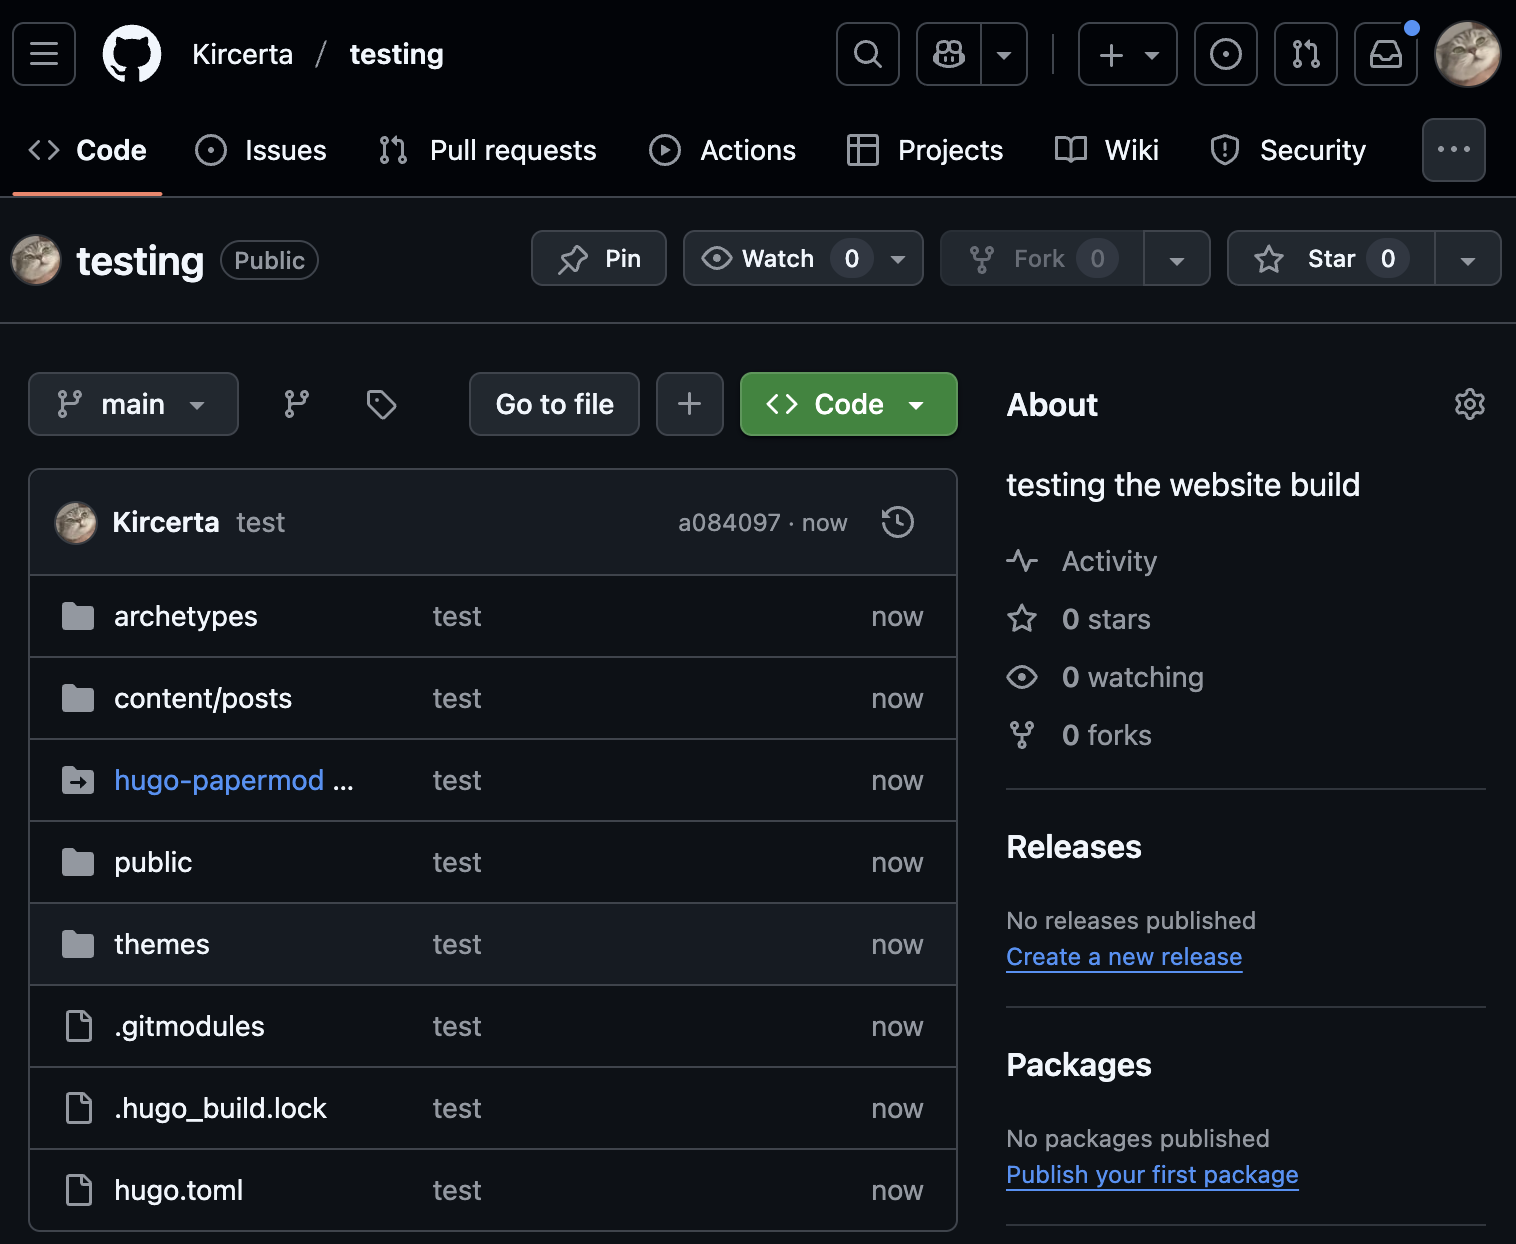
If successful, refresh your repository page and you should see all local content pushed:
Next, deploy with Vercel. First link your GitHub account:
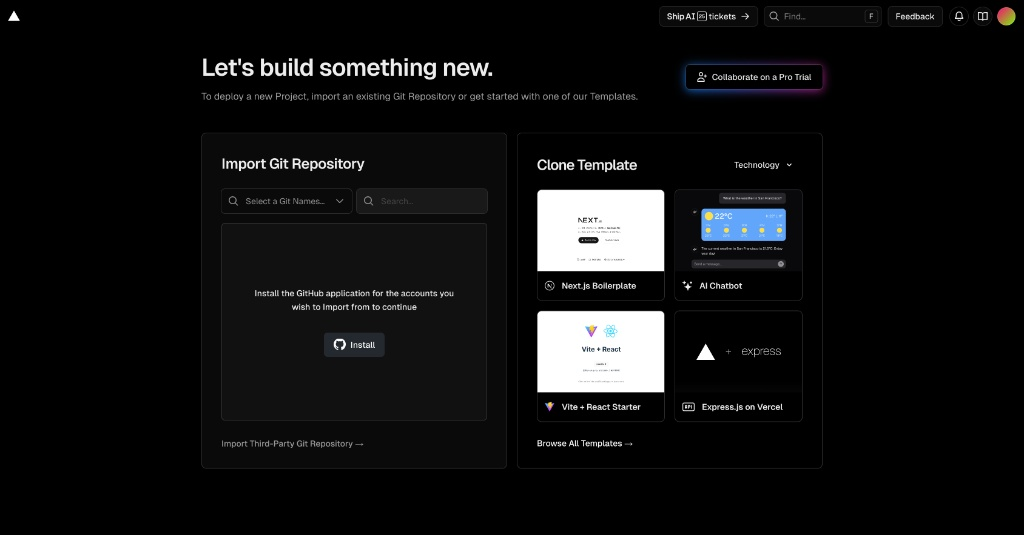
Authorize Vercel to access GitHub. When prompted for repository access, choose All repositories for the simplest setup. After authorization, return to Vercel, click Import for your blog repo, then click Deploy.
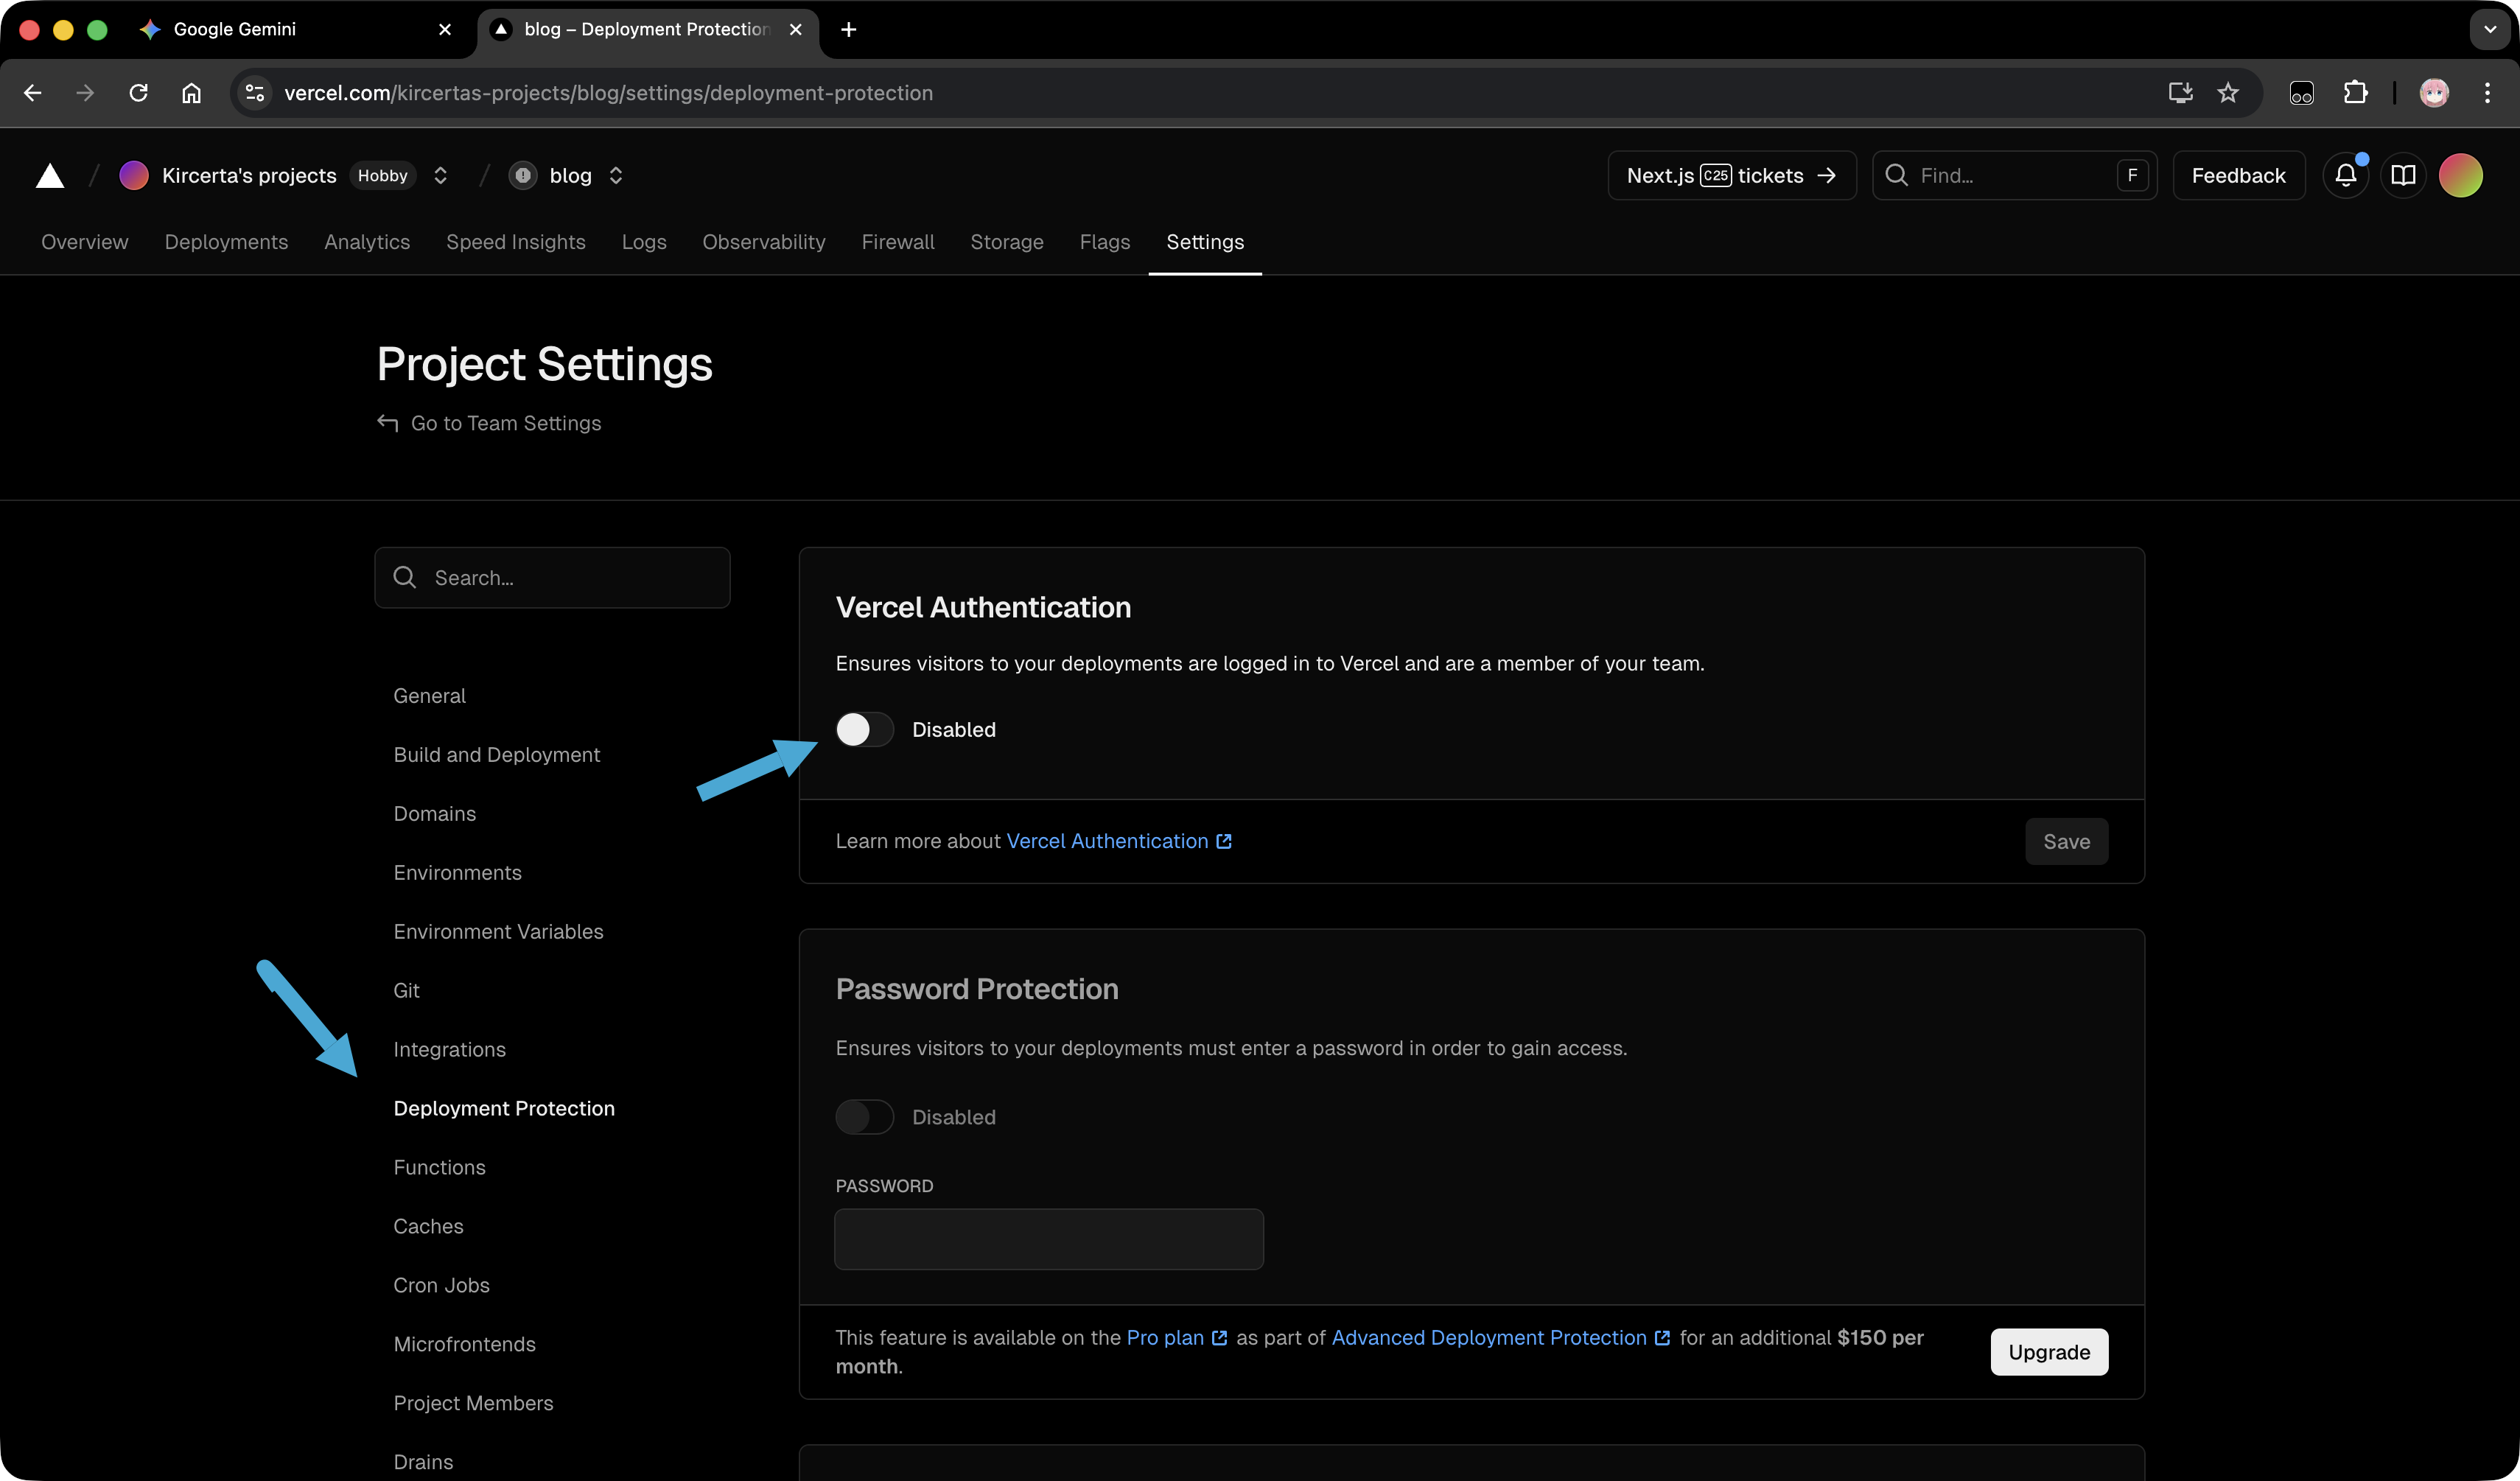
At this stage, there are still a few settings to tweak.
First, disable this option in Vercel so your blog is publicly visible:
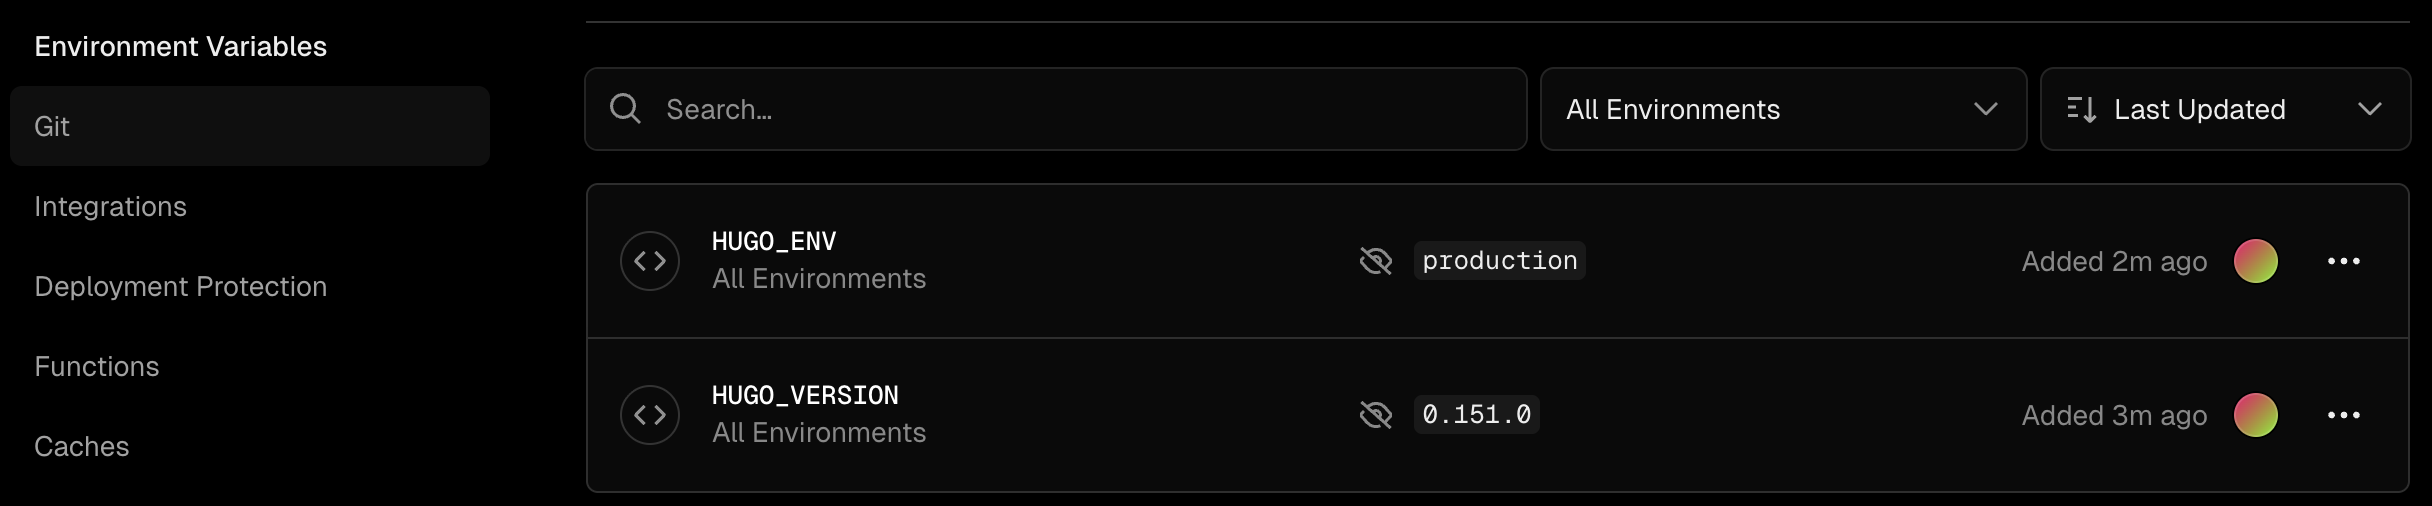
Then update settings in Environment Variables and Build and Development Settings.
Add these two environment variables:
HUGO_ENV production
HUGO_VERSION 0.151.0
```toml
If your installed Hugo version differs from `0.151.0`, replace it with your exact version.
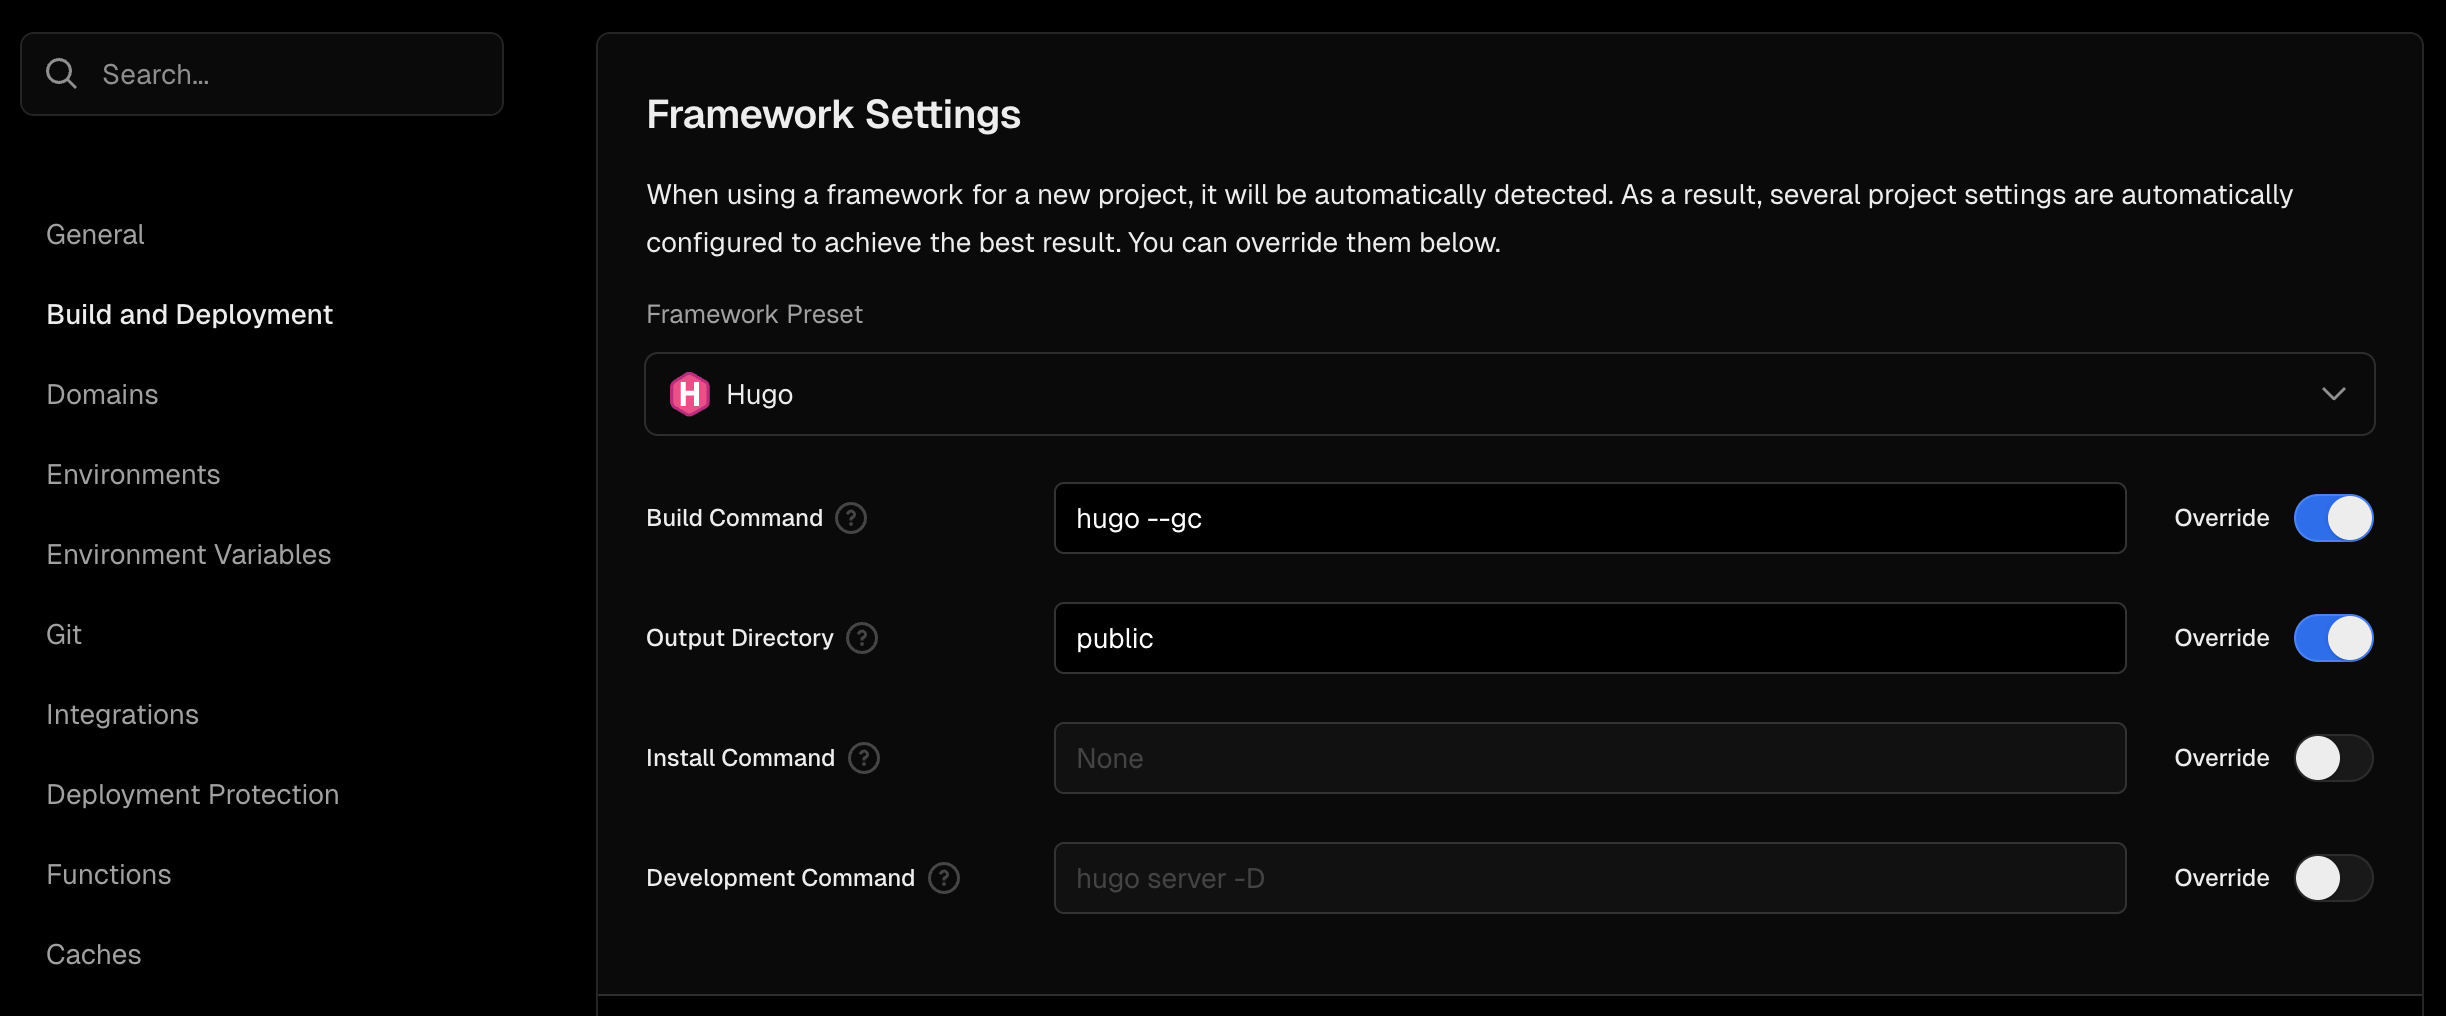
In Build and Development Settings, set Framework Preset to Hugo:
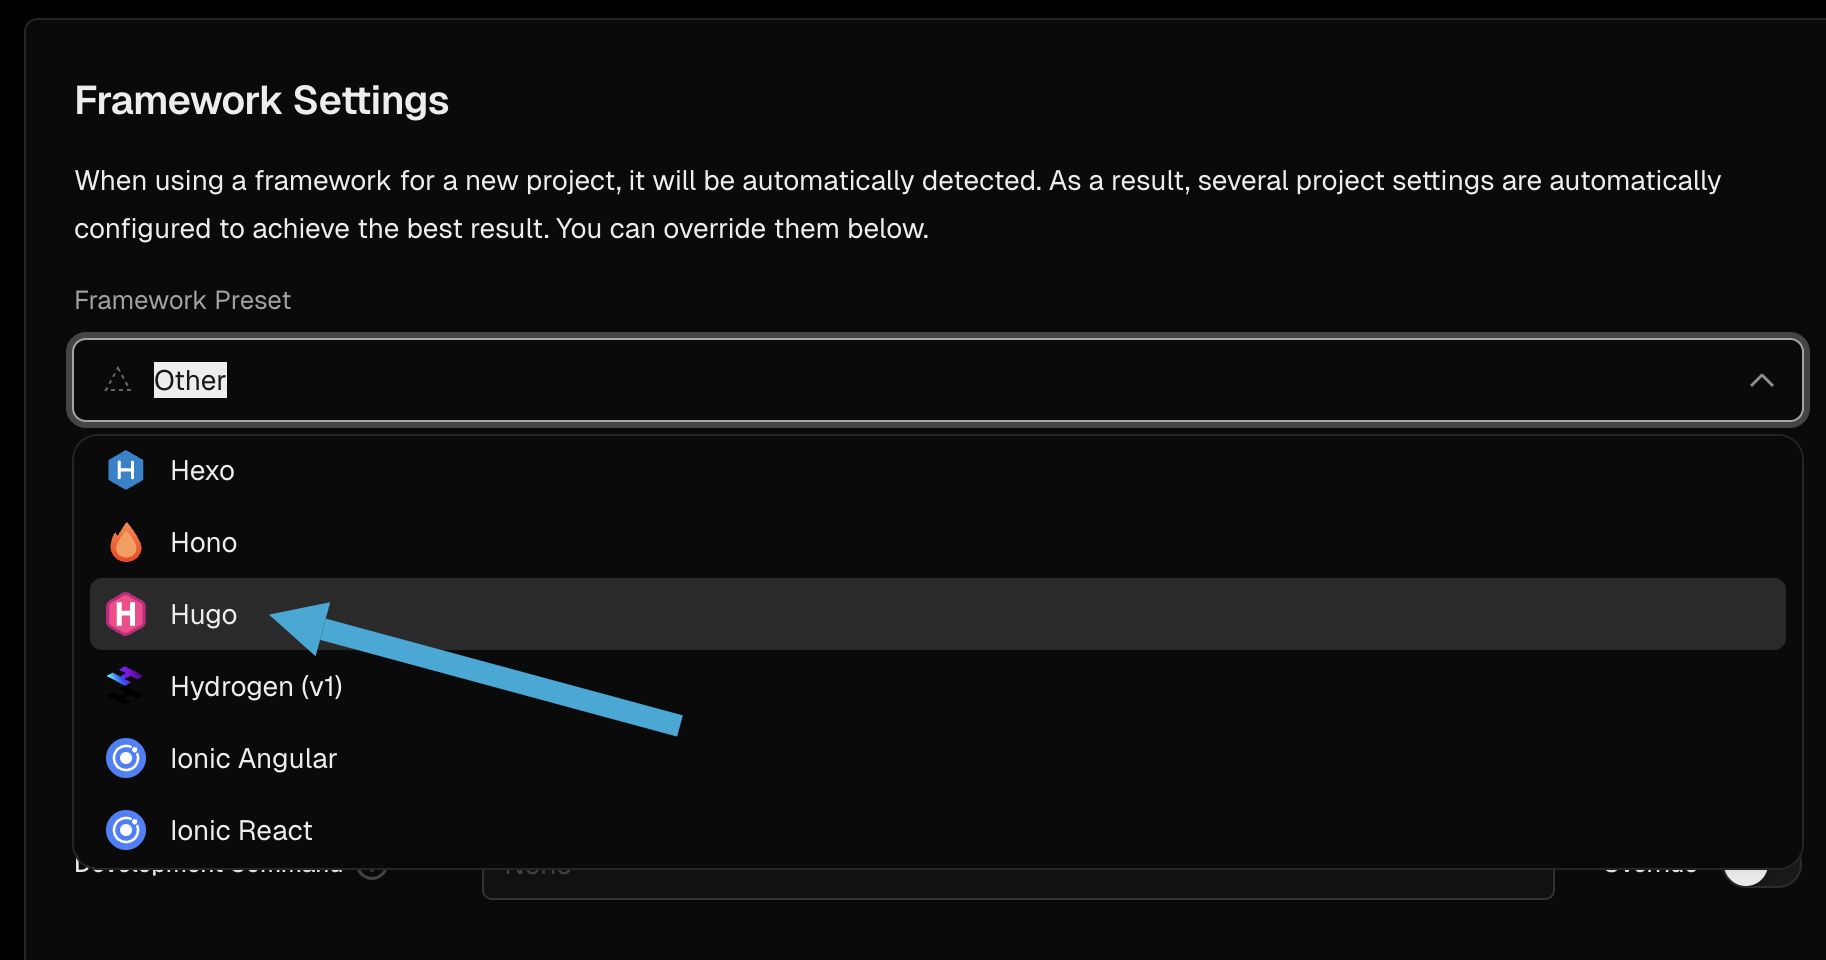
Enable Override for the first two fields:
- Build Command: `hugo --gc`
- Output Directory: `public`
Finally, update `baseURL` in `hugo.toml` to the URL Vercel generated for your deployment:
```toml
baseURL = "https://<Your URL>.io/" # Replace with your actual Vercel URL.
Commit and push again:
git add .
git commit -m "update baseURL"
git push
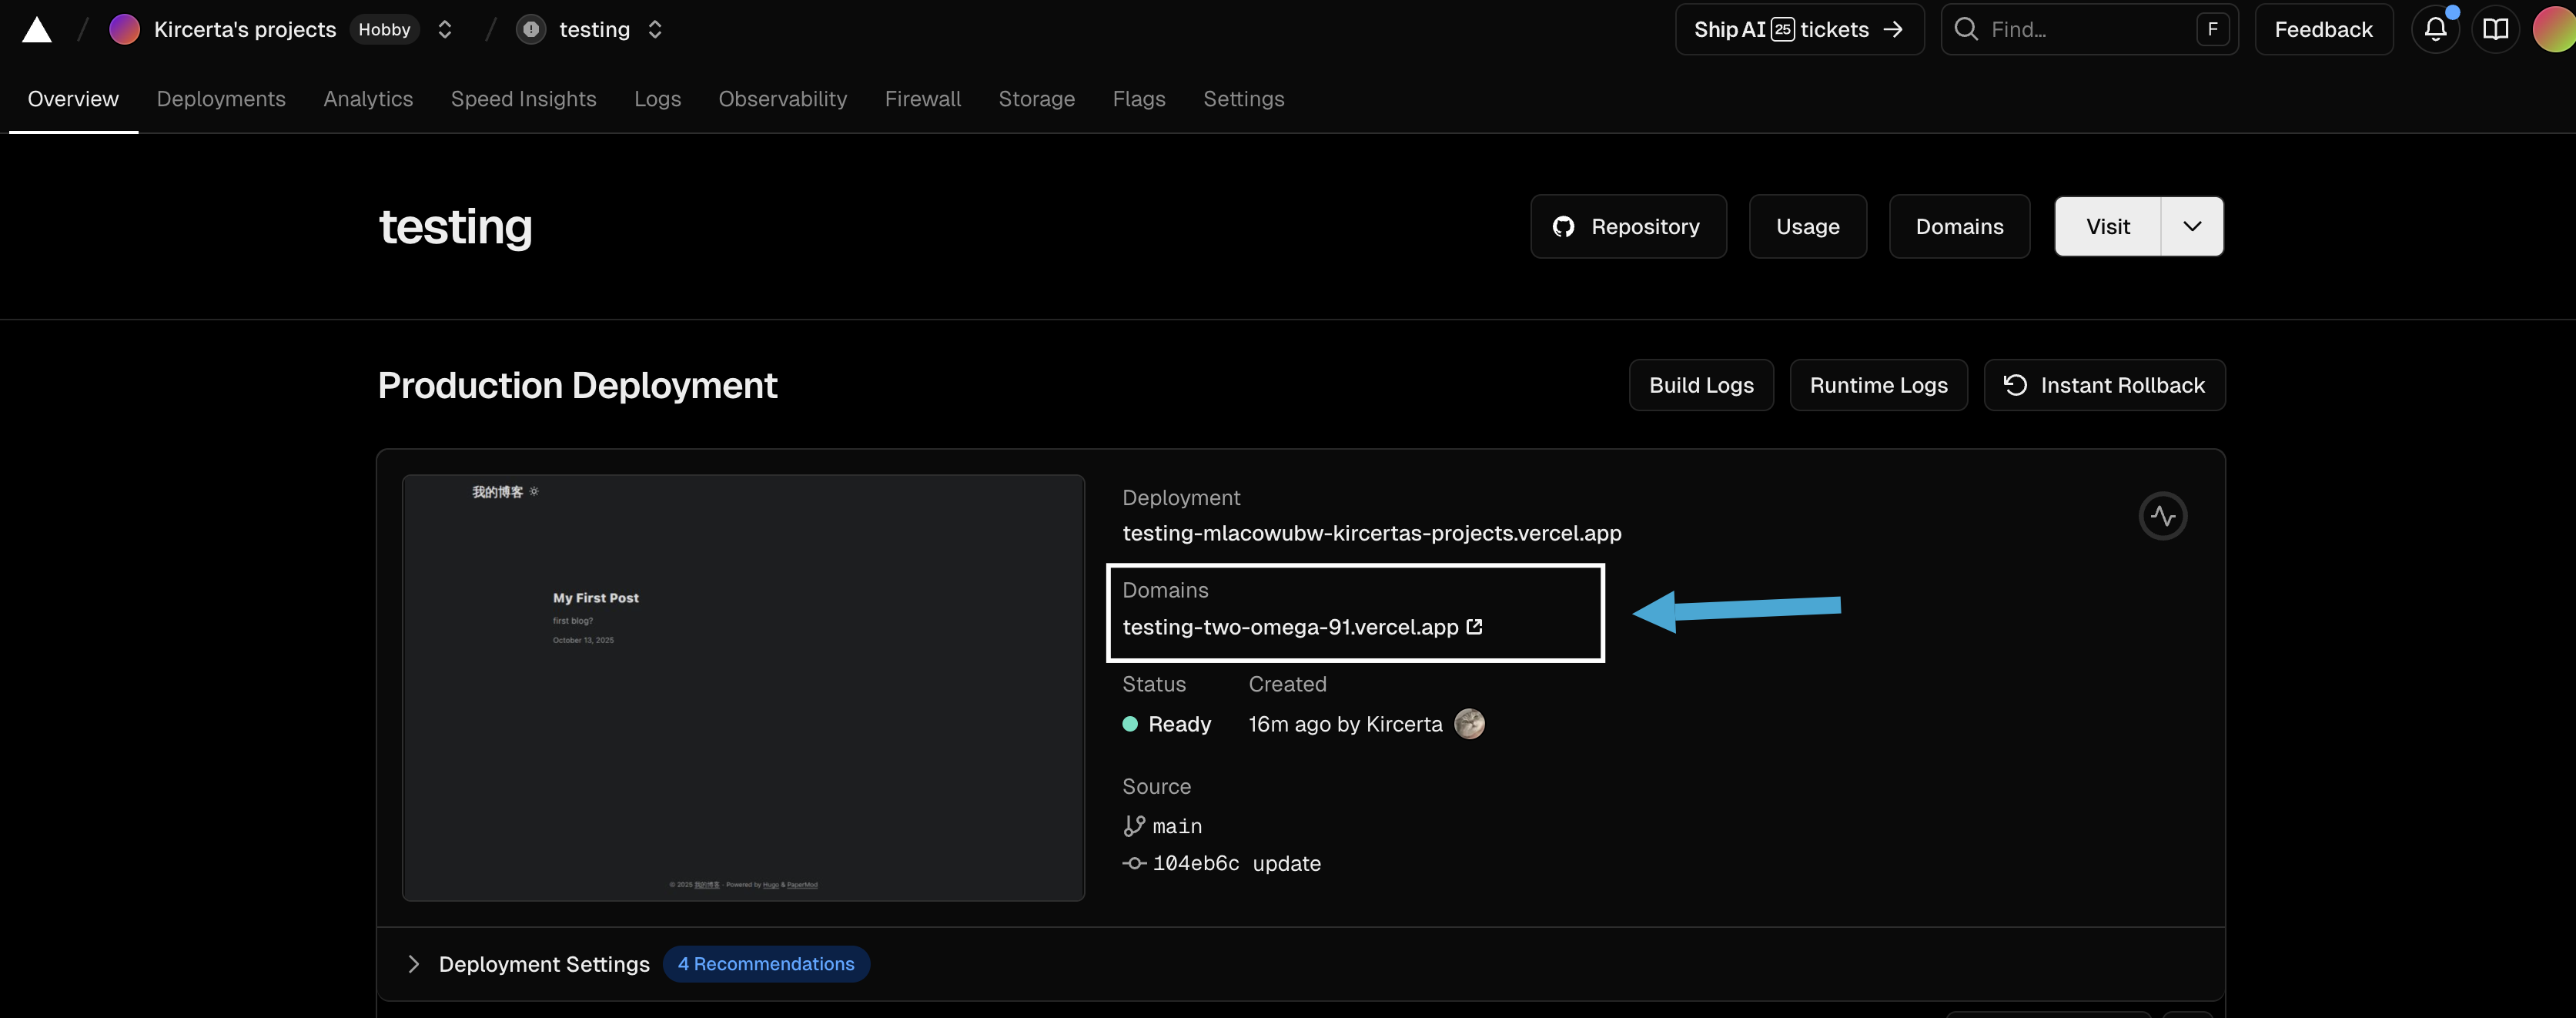
Once this is done, your site is officially live and publicly accessible.
I hope this article helps. Wishing you a smooth build and deployment process for your own personal website.